User Tools
This is an old revision of the document!
Page Contents
The Camera Tool
In section 2D and 3D Views we have explained how 2D and 3D views work and how you use them to explore and navigate the map. We have also mentioned (albeit briefly) that each 3D view has a “camera” assigned: A camera specifies a viewing origin (sometimes also called “eye position”) and an orientation. When you use the mouse or keyboard to look, move, pan, zoom or orbit in a 3D view, you actually manipulate the related camera position and orientation, and the 3D view in turn uses the updated camera details to update the scene rendering.
We believe that the mouse and keyboard camera controls of section 2D and 3D Views are so powerful and easy to use that you will use them virtually all the time.
The purpose of the Camera tool is to add the less frequently needed extras: You can create new cameras (and assign them in turns to 3D views), and edit their origins and orientations in the 2D views.
To activate the Camera tool, click on the related icon in the tool bar or press SHIFT+C.
Creating a camera
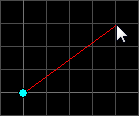
To create a new camera you have to hold the SHIFT key down and left click into a 2D view to define an eye position and then move the mouse to drag a viewing direction for this camera.
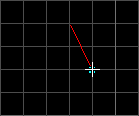
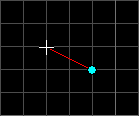
The eye position of the camera is displayed as a cyan colored circle and the viewing angle is a red line if the camera is the active camera of the 3d view or a cyan line if the camera is currently inactive.
As the new camera is created, it becomes the active camera and the 3D view changes to this camera.
Note that created cameras are not saved and lost if you close the map.
Manipulating the origin and orientation
The most powerful and most convenient method to manipulate a camera is to use the controls described in section Navigating the 3D views (in addition, the controls described there do not require the Camera tool to be active: they work always).
Sometimes however, it is worthwhile to set the origin and/or the orientation in a 2D view:
 To change the position of the camera eye, click on the cyan colored circle and drag it to its new location.
To change the heading of the viewing angle, click on the endpoint of the line representing the viewing angle and drag it to its new position.
Note that you can also move the whole camera preserving its current heading by pressing the CTRL key while moving either camera position or viewing angle.
Switching between cameras
Only one camera can be active at a time and therefore define the viewport of the 3D view. To change the active camera you can use the PAGEUP and PAGEDOWN keys to cycle trough all cameras.
Another way to change the active camera is to click on the camera in a 2D view.
Camera tool keyboard shortcuts
PAGEUP- Activate next camera.
PAGEDOWN- Activate latter camera.
ESC- End camera tool and switch to Selection tool.
SHIFT- Clicking in 2D view creates new camera
CTRL- While moving the camera → camera heading doesn't change


