User Tools
Page Contents
The Materialviewer
The Cafu SDK comes with a Materialviewer program, that can load and render a material in the same way the engine would.
The program is therefore a very useful utility to test your materials and see how they will look in the engine.
The command-line
The Materialviewer is a command-line driven program. If you run it without any parameters, it prints a short help message:
C:\Cafu-9.06> MaterialViewer.exe

Cafu Material Viewer (Jul 04 2009)

Warning: Games/DeathMatch/Textures/TechDemo.zip: No such file or directory
Warning: Games/DeathMatch/Textures/SkyDomes.zip: No such file or directory
Please use the -m option in order to specify the desired material!

OPTIONS:

-m=MyMaterial specifies the name of the desired material, which must be
   defined in one of the material script files (see below).

-bd=base/dir specifies the base directory from which I look both for material
   scripts and the materials associated textures.
   The default (if you don't use -bd) is Games/DeathMatch

-ms=MyMatScript.cmat specifies the material script that contains a definition
   of "MyMaterial" (see above). You may use -ms several times, making me look
   into each specified script for a definition of the material.
   If you do not use -ms at all, I'll look into ALL material scripts that I can
   find in Games/DeathMatch/Materials, so you probably don't need it as well.

-r=RendererXY overrides the automatic selection of the "best" renderer,
   and loads the renderer with base name RendererXY instead.
   Only provide the base name (e.g. RendererOpenGL12), no path and no suffix.
In most cases, just pass the name of the desired material as shown in The Material Browser in order to run the Materialviewer. Example:
C:\Cafu-9.06> MaterialViewer.exe -m=TechDemo/walls/wall-13f
The Materialviewer Window
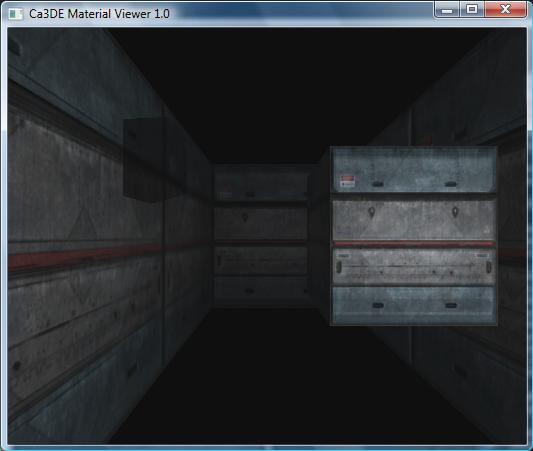
The Materialviewer window contains a cube whose faces are applied with the selected material. The cube is surrounded by 4 walls, that have also the material applied. The bottom and top of this “room” are colored black.
You can turn on up to 4 dynamic light sources, that move around the scene and illuminate the cube from different angles. Light sources come in 4 colors (white, red, green, blue) and can all be activated separately using the keys 1-4.
Keyboard and Mouse Controls
Use the following keys to control the Modelviewer:
| Key | Action |
|---|---|
ESC | Quits the program, same as ALT+F4. |
1 | Toggles if white light is visible. |
2 | Toggles if red light is visible. |
3 | Toggles if green light is visible. |
4 | Toggles if blue light is visible. |
The following keys can be held down to achieve an effect:
| Key | Action |
|---|---|
W or Arrow key up | Moves the camera forward. |
S or Arrow key down | Moves the camera backwards. |
A or Arrow key left | Strafes the camera to the left. |
D or Arrow key right | Strafes the camera to the right. |
Further on you can change camera direction along the x axis by holding down the left mouse button and moving the mouse left or right.
