User Tools
Page Contents
The New Bezier Patch Tool
The New Bezier Patch tool is an easy to use tool, if you want to create curved surfaces such as pipes or uneven floors.
A Bezier Patch is in its pure form a plane with a grid of vertices (with variable grid density), that can be moved to change the form of the Bezier Patch.
To activate the tool, use the related icon from the tool bar or press SHIFT+P.
The Tool Options Bar
The Tool Options Bar lets you choose from different source forms, that a created Bezier Patch will adopt at the beginning. Possible forms are:
- Flat: A simple flat plane.
- Cylinder: A Bezier Patch bent into a cylindric form without bottom or top.
- Open Box: A rectangular box without bottom or top.
- Half Cylinder: A Bezier Patch bent into a half cylinder.
- Quarter Cylinder: A Bezier Patch bent into a quarter cylinder.
- Edge Pipe: Basic form to easily create edges of pipes.
- Cone: A Bezier Patch bent into a simple cone.
- Sphere: A Bezier Patch bent into a spherical form.
- Convex Endcap: Creates a quarter cylinder convex endcap.
- Concave Endcap: Creates a quarter cylinder concave endcap.
The Checkboxes with convex endcaps and with concave endcaps determine whether a newly created bezier patch should have fitting endcaps at creation.
The fields width and height define the number of vertices on the two axis of the Bezier Patch. Higher values mean a higher density of vertices.
Note that these options are not available for all basic bezier patch forms.
The Subdivs Horz and Subdivs Vert controls adjust the subdivisions of a bezier patch in x or y direction. A higher value means a more seamless bezier patch surface. You can also use these two controls to adjust the subdivisions of a currently selected bezier patch.
Values of -1 mean, that the number of subdivisions is chosen automatically.
Creating a Bezier Patch
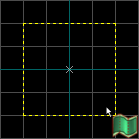
To create a new patch you have to drag a box in a 2D view that defines the size of the Bezier Patch (note that the box has to be spatial even if you want to create a Flat Bezier Patch).
After the box is created you can then resize it to your liking.
Finally press ENTER to create the Bezier Patch in its chosen source form.
Forming a Bezier Patch
To form a Bezier Patch you have to activate The Selection Tool and select the patch you want to form.
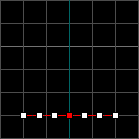
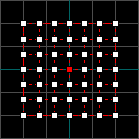
Forming the patch is done by activating The Edit Vertices (Morph) Tool. Now you can see all control vertices of the Bezier Patch in the 2D views as well as in the 3D view. You can drag control vertices in both views to form the patch in the same way you drag vertices of brushes (see here).
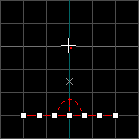
In this example the center vertice is selected and moved up in a side view.
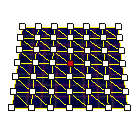
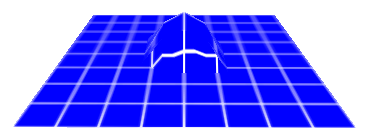
Altough only the center vertice has been moved, the Bezier Patch has changed its form creating a smooth bump instead of a peak.
Applying materials to Bezier Patches
Materials are applied onto bezier patch surfaces using The Edit Surface Properties Tool.
New Bezier Patch tool keyboard shortcuts
ESC- Back to Selection tool.
ENTER- If Bezier Box is opened → create Bezier Patch.
ALT- Temporarily ignore grid snap while creating a Bezier box


